Introduction
When it comes to skincare, natural remedies often deliver the most impressive results. One of the most effective and affordable solutions is learning how to make a salt scrub recipe that works perfectly for your skin type. Whether you’re looking to exfoliate with sea salt or create a luxurious spa experience at home, a DIY salt scrub is your answer. In this comprehensive guide, we’ll explore everything you need to know about creating the perfect salt exfoliating scrub recipe that will transform your skincare routine and leave your skin glowing and renewed. The beauty of understanding how to prepare a salt scrub recipe lies in its simplicity, effectiveness, and cost-efficiency.
Why Choose Salt Scrubs for Your Skincare Routine?
The Science Behind Salt Exfoliation
Salt scrubs have been used for centuries across various cultures for their remarkable healing properties. The crystalline structure of salt particles makes them ideal for gentle yet effective exfoliation. When you exfoliate with sea salt, you’re not just removing dead skin cells—you’re stimulating blood circulation and promoting cellular renewal. The benefits of incorporating salt for salt scrub applications into your skincare routine are extensive. Salt acts as a natural antimicrobial agent, helping to cleanse pores and prevent bacterial growth. This makes a DIY salt scrub particularly beneficial for individuals dealing with acne-prone or congested skin.
Natural Ingredients for Optimal Results
Understanding what goes into your salt exfoliating scrub recipe is crucial for achieving the best results. The key components include natural salts, carrier oils, and complementary ingredients that work synergistically to enhance your skin’s appearance and health.
Essential Ingredients for Creating Your Salt Scrub Recipe
Types of Salt: Choosing the Right Base
The foundation of any salt scrub recipe begins with selecting the appropriate salt. Different salts offer varying benefits:
- Sea Salt remains the most popular choice for a DIY salt scrub. It contains essential minerals, including magnesium, potassium, and calcium, that nourish the skin while providing excellent exfoliating properties. Sea salt crystals are typically uniform in size, making them ideal for a salt exfoliating scrub recipe that won’t be too harsh on delicate areas.
- Epsom Salt offers a gentler alternative, making it perfect for sensitive skin types. When creating a DIY Epsom salt scrub, you benefit from its anti-inflammatory properties and ability to ease muscle tension. This makes an Epsom salt scrub excellent for full-body treatments, particularly for feet and hands.
- Himalayan Pink Salt provides a mineral-rich option that many beauty enthusiasts prefer. This premium choice adds a luxurious feel to your salt scrub recipe while delivering additional nutrients to the skin.
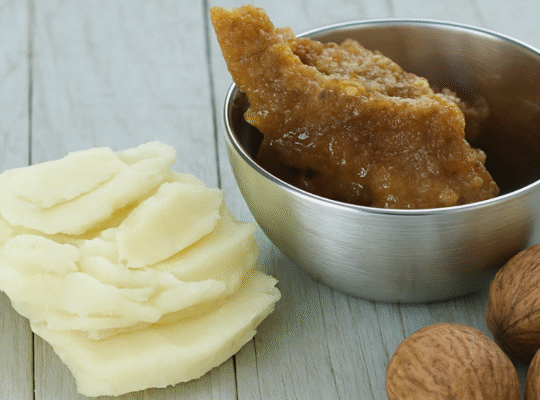
Carrier Oils: The Moisturizing Component
While the salt provides exfoliation, a quality carrier oil ensures your salt scrub recipe doesn’t dry out your skin. Popular options include:
- Coconut Oil: Creates a smooth texture and provides antimicrobial benefits
- Jojoba Oil: Mimics skin’s natural oils and absorbs quickly
- Almond Oil: Offers nourishing properties and a pleasant aroma
- Olive Oil: Provides deep hydration and antioxidants
Additional Beneficial Ingredients
To elevate your homemade salt scrub for face and body, consider adding:
- Essential Oils: Lavender, eucalyptus, peppermint, or lemon for aromatherapy benefits
- Honey: Natural humectant that attracts moisture to the skin
- Vitamin E Oil: Powerful antioxidant for anti-aging benefits
- Activated Charcoal: Perfect for detoxifying treatments
- Coffee Grounds: Adds texture and caffeine benefits for circulation
Step-by-Step Guide: How to Make a Salt Scrub Recipe
Basic Formula
Creating a salt scrub recipe at home is remarkably simple. The standard ratio is:
- 2 cups of salt for salt scrub (sea salt or Epsom salt)
- 1/2 cup of carrier oil (coconut, jojoba, or almond oil)
- 10-15 drops of essential oil (optional)
- 1 tablespoon of honey (optional)
Preparation Instructions
Step 1: Measure Your Ingredients
Begin by gathering your components for your salt exfoliating scrub recipe. Use a clean glass bowl to avoid any contamination. For a DIY salt scrub, precision in measurements ensures consistent results.
Step 2: Combine Dry and Wet Ingredients
Pour your chosen salt scrub base into the glass bowl. Slowly add your carrier oil while stirring continuously. This gradual incorporation prevents the mixture from becoming too oily or too dry. The ideal consistency should resemble wet sand that holds together when squeezed.
Step 3: Incorporate Optional Additions
If you’re preparing a homemade salt scrub for the face, add honey and mix thoroughly. For a DIY Epsom salt scrub, this step remains the same. Add essential oils drop by drop, stirring well after each addition to ensure even distribution throughout your salt scrub with Epsom salt mixture.
Step 4: Final Texture Adjustment
If your salt exfoliating scrub recipe appears too thin, add more salt for the salt scrub incrementally. If it’s too thick, incorporate carrier oil a teaspoon at a time. The perfect consistency should spread easily but maintain its granular texture.
Step 5: Storage
Transfer your salt scrub recipe to clean glass jars with tight-sealing lids. Store in a cool, dry place away from direct sunlight. Properly stored salt scrubs remain effective for up to three months.
Specialized Salt Scrub Recipes for Different Needs
Luxurious Spa-Style Recipe
This premium homemade salt scrub for the face combines elegance with effectiveness:
- 2 cups sea salt
- 1/2 cup coconut oil
- 8 drops lavender essential oil
- 6 drops of chamomile essential oil
- 1 tablespoon honey
- 1 tablespoon vitamin E oil
This recipe exemplifies how to exfoliate with sea salt while creating an aromatherapy experience. Your salt scrub with Epsom salt alternative would substitute one cup of Epsom salt for half the sea salt amount.
Energizing Citrus Salt Scrub Recipe
Perfect for morning routines:
- 2 cups Himalayan pink salt
- 1/2 cup jojoba oil
- 10 drops lemon essential oil
- 5 drops grapefruit essential oil
- 1 tablespoon honey
This DIY salt scrub variation invigorates the senses while delivering excellent exfoliating benefits.
Detoxifying Charcoal Salt Scrub Recipe
Ideal for deep cleansing:
- 2 cups sea salt
- 1/2 cup olive oil
- 2 tablespoons activated charcoal
- 8 drops of tea tree essential oil
- 1 tablespoon honey
This advanced salt exfoliating scrub recipe targets congested pores and impurities.
How to Use Your Salt Scrub Recipe Effectively
Application Techniques
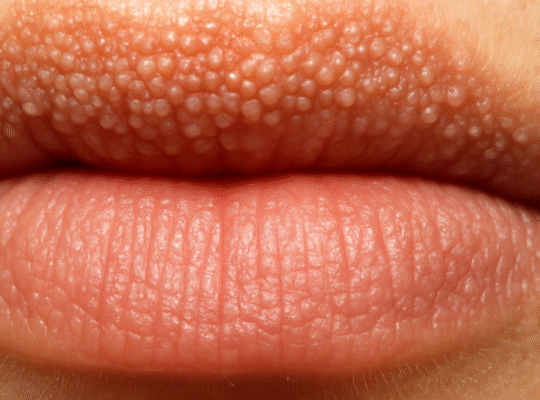
Once you’ve created your salt scrub recipe, proper application ensures maximum benefits. Wet your skin with warm water to open pores and soften the outer layer. Apply your homemade salt scrub for the face using gentle circular motions, avoiding the delicate eye area. For body treatments, use firmer pressure on tougher areas like heels and elbows.
Frequency Recommendations
Use your DIY salt scrub two to three times weekly. Those with sensitive skin should limit usage to once weekly or opt for a DIY Epsom salt scrub instead. Your salt scrub regimen should be adjusted based on your skin’s response.
Post-Scrub Care
After using your salt scrub with Epsom salt or any variation of this salt exfoliating scrub recipe, follow with a hydrating toner or facial mist. Complete your routine with a nourishing moisturizer to lock in hydration.
Benefits of Using Your DIY Salt Scrub
Physical Exfoliation Advantages
A quality salt for salt scrub effectively removes dead skin cells and surface impurities. Regular use of your salt scrub recipe promotes a smoother texture and more radiant appearance.
Improved Circulation and Skin Health
When you exfoliate with sea salt, you stimulate blood flow to the skin’s surface, promoting a healthy glow. This enhanced circulation supports the skin’s natural renewal processes.
Cost-Effective Skincare Solution
Creating your homemade salt scrub for face at home costs a fraction of commercial alternatives while delivering superior results. Your DIY salt scrub investment pays dividends through consistent, long-term use.
Customization for Individual Needs
Unlike commercial products, your personalized salt exfoliating scrub recipe can be adjusted to target your specific skin concerns. Whether you need anti-aging benefits, acne-fighting properties, or simple hydration, your salt scrub recipe can be modified accordingly.
Safety Considerations and Best Practices
Skin Type Considerations
While salt scrubs benefit most skin types, certain precautions apply. Those with extremely sensitive, damaged, or compromised skin should consult dermatologists before using a salt scrub recipe. Individuals with active acne breakouts might prefer a gentler DIY Epsom salt scrub over more abrasive alternatives.
Patch Testing
Before applying your new salt exfoliating scrub recipe to large areas, perform a patch test. Apply a small amount to your inner arm or behind your ear and monitor for any adverse reactions over 24 hours.
Quality Ingredients Matter
Invest in high-quality salt for salt scrub and carrier oils. Pure, untreated ingredients ensure your homemade salt scrub for face delivers optimal benefits without unwanted additives.
Conclusion
Mastering how to make a salt scrub recipe empowers you to take control of your skincare journey. Whether you choose to exfoliate with sea salt, create a DIY salt scrub for relaxation, or prepare a specialized salt scrub with an Epsom salt formula, you’re making a smart investment in your skin’s health. The versatility of salt scrubs means you can continuously adapt your salt exfoliating scrub recipe to address changing skin needs throughout the seasons. By following this comprehensive guide, you now possess the knowledge to create professional-quality homemade salt scrub for face and body treatments that rival expensive spa offerings. Your DIY Epsom salt scrub or sea salt alternative will become a cornerstone of your skincare regimen, delivering consistent, visible results.